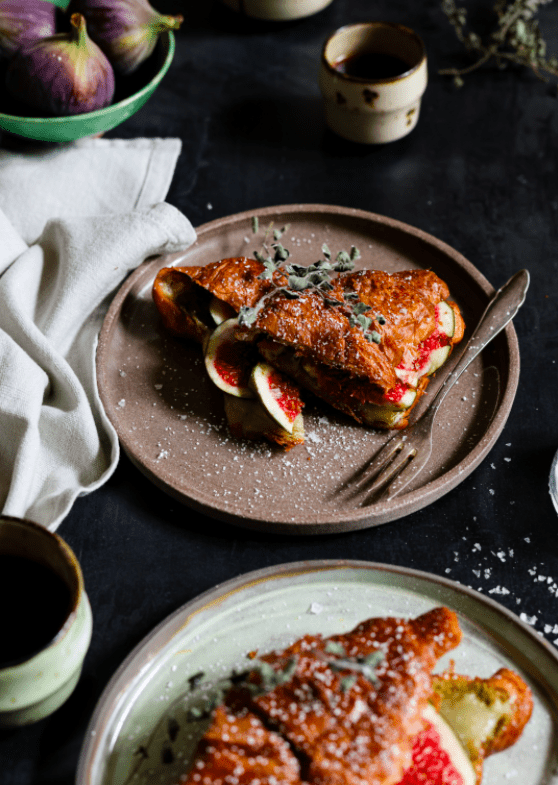
A great food photograph communicates freshness, color, texture, and the context or story behind the food being photographed.
High-quality food images should also inspire viewers to take the next step towards indulging in the flavors and aromas of the food they are looking at, whether by ordering the item from a menu, preparing the relevant recipe, or ordering the dish or its ingredients online.
Especially for commercial applications, bringing in a professional food photographer to capture images of your dishes or products is often a good idea.
These professionals have experience in composing food images, using props appropriately, and making any dish or food product look as delicious as it tastes in real life.
However, if you’re getting started in the world of food photography or trying to capture great food photographs on a budget, there are many useful tips you can use to up your food photography game and create high-quality images.
Here are 31 food photography tips to create photos that make food look as great as it tastes.
1. Plan ahead
Spontaneity is an important part of good food photography, but that doesn’t mean you should fly by the seat of your pants during a shoot.
Unless you are taking photos of packaged long-life food products, the food items you are photographing are perishable and need to be photographed soon after preparation.
Planning involves thinking ahead about what you need to get the best shoot, including:
- which shots you want to capture for each food time
- what props you will required to get the best out of each shot
- where you will get your props, whether it’s at home or from your local bric-a-brac store
- what you’ll need to get optimal lighting for each photograph
- whether you will need human models to interact with food in your shoot.
Also, think of what you are trying to say with your shoot. If there is a story behind the dish you are photographing you will make your images more compelling by referencing it in your shoot.


2. Look for inspiration
Don’t try to make up your photo compositions as you go along.
Instead take some time to go through food photography in recipe books, blogs, and on Instagram and find images that inspire you.
These will give you important cues for what types and angles of lighting, props, and approaches to image composition will result in an image you are happy with.
This will also give you a clear benchmark to work towards during your food photography shoot.
3. Become a shadow
If you’re brand new to food photography, don’t be shy to contact a local food photographer you admire and ask them if they’d mind using you as an assistant on a shoot.
Instagram and blogs make it very easy to contact top-class food photographers.
You’re going to get a few rejections, and some photographers may ignore your messages outright.
However, once you land a gig as an assistant in a shoot you’ll have an opportunity to learn a lot about food photography in a very short period, which will massively accelerate your development as a food photographer.


4. Get the right camera
It is possible to take decent food photographs using the cameras available on many high-end smartphones, or by using an inexpensive point-and-shoot camera.
However, it is better to invest in a proper camera for food photography if you’re serious about creating a professional-looking product.
DSLR cameras (digital single-lens reflex cameras) are well suited to food photography, providing control over exposure and focal length, besides being compatible with detachable lenses.
5. Shoot in RAW format
If you do take the step of getting yourself a DSLR camera, then make sure you take your photographs in the RAW image format.
Once you’ve captured your images in RAW format you’ll benefit from being able to do much more fine-tuned processing of images once you have completed the shoot.
Bear in mind that RAW format images will use up a lot of storage space, so you should have a backup storage card or two in hand for the shoot.
6. Invest in a tripod
A tripod is a necessity when taking photographs of food. It not only stabilizes your camera but also provides a consistent depth of field and angles between different food shots.
And best of all tripods are inexpensive. You can easily get hold of high-quality tripods for as little as $50 online. Go for a top-of-the-range tripod and you should still come in under $100.
Once you have your tripod setup you won’t need to worry about wasting your time shooting grainy or blurry food photographs.


7. Make use of detachable lenses
Using specialized camera lenses is one of the key factors that distinguishes professional food photographs from the efforts of amateurs.
Using detachable lenses with a DSLR camera will give you full control over the depth of field in your photographs and really bring the food you are photographing to the fore.
Compact fixed lenses are a popular option as they are cheap, small, faster to use than zoom lenses, and offer wide apertures that provide additional control over depth of field.
8. Use natural light
If you’re new to food photography chances are you don’t have access to a professional studio with expensive artificial lights to help you control lighting with precision.
The good news is that many professional food photographers consider natural lighting to be superior to artificial or studio lighting anyway, as it captures much more natural colors and textures.
Assuming you will be shooting indoors, make the effort to find a room with strong natural lighting (north-facing in the southern hemisphere or south-facing in the north), and don’t restrict yourself to the kitchen.
When it comes to choosing a time of day to shoot, the golden hour at dawn and dusk will typically provide you with soft, consistent lighting, while sunny mornings provide clear bright light.
The only real downside of using natural light is that you won’t have much flexibility in terms of time management, as the lighting will dictate how long you have to shoot your images.


9. Light control
Whether you’re working with artificial or natural light, you don’t want to rely on camera settings or editing software to get the light balance right in your images.
Instead, you’ll need to control light by using reflector or diffusor boards.
This may sound complicated or technical, but all you need to reflect light onto the object you’re photographing is a white foam board.
And a black foam board can be used to absorb light and bring out more shadows in the object you are photographing.
10. Play with lighting angles
There are three basic approaches to using lighting for food photography, each of which has its place in creating memorable images.
Front lighting is the most basic form of lighting and has the benefit that it reduces the amount of shadow on your food.

Side lighting is great for bringing out contrast in your food, making for more detailed, textured images.

Backlighting is more challenging than the first two approaches but creates cleaner backgrounds that help bring the food you are photographing to the foreground.

11. Forget the flash
Artificial light sometimes has a role to play in food photography, but you absolutely do not want to use your camera’s front flash to compensate for poor lighting.
This will cause numerous problems, leaching color and texture from the food, distorting colors, and creating a product that doesn’t look either realistic or tasty.
The only time you should consider using an artificial flash is if you want to bounce light off other reflecting surfaces onto your dish.
12. You don’t need to do it all yourself
Trying to cook a delicious, eye-catching dish is a challenge. Trying to then capture it on film heaps on the pressure.
Rather than trying to do it all, partner up with a chef or a friend who is an avid foodie. Have them prepare the dishes while you focus on taking great photos.
Working with someone else will also provide you with a free model if you want to add human interaction, like sauce pouring, to your images.
Just ensure their hands are clean and moisturized before you take the shot!


13. Focus on the thing that makes the dish great
You can’t treat every dish you photograph in the same way.
The thing that makes a fresh hamburger look fantastic on film will not be the same thing that makes a photograph of a double-thick milkshake pop.
Knowing what to focus on when you take your photo will give you a better result.
For example, creating and capturing condensation as well as bright colors will make a milkshake look fantastic.
Meanwhile, for a burger, you want to capture the freshness of the garnishes and ensure the patty looks moist and succulent.
14. Use props but don’t create clutter
Props are particularly important for food photography because they not only bring context to the image but can also be used to highlight select ingredients of the dish you are photographing.
However, you need to ensure that any item you include in your food photographs doesn’t distract from the food you are photographing.
So, if an item of cutlery or a busy background is distracting or otherwise making the image too busy, stick to the philosophy that less is more and only retain items that need to be there.


15. Freshness is key
Food photography poses a unique challenge because the appearance of the item you are photographing can change significantly during a shoot.
While this won’t be a problem if you’re photographing non-perishable food items, it can become a real issue when you are working with freshly prepared foods.
Congealing food or wilting vegetables can ruin your photos even if you get everything else right.
The only way to get around this is to plan your shoots carefully so that photographs can be taken right after a dish is prepared and assembled.
You should always ensure you use the freshest possible ingredients in your food shots, whether they are part of the main dish or a garnish.
The fresher the produce the more time it gives you to get the right shot.
16. A touch of oil and ice
Even if you act fast to photograph a dish once it has been prepared, food may have enough time to wilt and lose some of its visual appeals.
That’s where oil and ice come in.
Oil can be used to make your food shine or glisten if it has lost too much moisture since being cooked. Meanwhile, ice water can help your garnishes and vegetables remain firm and fresh.
Another hack is to keep your green garnishes in a wet napkin in the fridge until you need them to complete the composition of your shot.


17. Get rid of glare
There is a real and present threat of glare from serving vessels, glassware, or cutlery sabotaging your food photographs.
You can deal with this in a number of ways.
One is to make use of a polarised lens or filter which will filter glare out of your images, giving you better overall control of lighting and enhancing the colors in your images.
Another option is to make use of anti-glare spray, which can be sprayed onto shiny items to give them a matte finish.
18. Shoot during cooking
Waiting until a dish is completed before taking photos is a common mistake amongst amateur food photographers who think they should only focus on the final result of the cooking process.
Nothing captures the vibrancy of food better than photographing it during the cooking process – think a sizzling steak on a hot pan versus a rested steak on a cutting board.
Cooking often leaches some color and texture out of food and taking photographs during the cooking process is a great way to capture the enhanced color and texture of fresh ingredients.
19. Set up your shot before the food is finished
We’ve mentioned that capturing freshness is essential for getting the best colors and textures into your food photographs.
If you’re going to wait until the food is finished to set up your camera and props, you are going to give your food time to cool down, congeal and generally lose its luster.
To avoid this, set up your shot using stand-in food while the food is cooking. You can use anything you like as a stand-in for the food, just make sure the lighting, angles, and depth of field are right and you’ll be good to go once your dish is ready to photograph.
20. Steaming hot images
Steam is an important cue in food photographs as it communicates that food is fresh and ready to serve. However, it can be easy to overlook when taking your shots.
To capture steam in your images, you’ll need to make use of a dark background that will create the contrast necessary to photograph steam.
Side lighting will also help illuminate the steam and provide contrast in the final image.


21. Clean your lens
A food photography shoot can get messy fast. You have cooking ingredients floating around, steam from hot food, and various drips and splatters to deal with.
Your camera lens is directly in the line of fire, which means it can pick up dirt or even get steamed over without this being immediately apparent.
Instead of discovering during editing that your images have been marred by dirt or steam on your lens, take the time to clean your lens between shots.
22. Make sure you have a backup battery
Since time is of the essence when you’re taking food images you need to be sure your camera has power at critical moments.
Having your battery fail and then waiting for it to recharge can easily sabotage your food shoot as the dishes you are photographing lose their freshness while you wait.
You could also miss out on those spontaneous moments that pop up during the cooking process, besides having to go through the extra effort required to make the dish again and get your timing right.
Rather than make this rookie error, ensure that your camera battery is fully charged and that you have a fully charged backup battery on hand before you start your shoot.
23. Mix up your angles
Unless you are taking images of non-perishable food products for an e-commerce food store, where consistency across image sets is critical, you should experiment with different angles.
Taking birds-eye-view images of dishes is very popular and a go-to approach for most food photographers, but many types of food look their best when photographed from the side – think of a hamburger or a layered cake.
Diagonal images are effective when shooting foods that are being cooked in pans or pots, and these also give you opportunities to play with light and shadow to bring out more detail in your images.
24. Use negative space
It can be tempting to zero in on a dish when you are photographing food, taking close-up shots that fill the frame and capture an abundance of detail.
While this may seem logical, it can easily force you to redo the entire shoot.
For a start, failing to create negative space around an image will eliminate the option of cropping it during image processing, forcing you to work within limited aspect ratios.
Then there’s the fact that you won’t have any empty spaces to work with if you want to put logos or text on the image – which will then make it busy and distract from the dish you’re photographing.
Finally, minimalism looks good. Adding some space to an image will bring the focal point to life and by providing a neutral contrast to your dish’s vibrant textures and colors.
This rule also applies when you are plating your food.
Don’t fall into the trap of filling a plate with food. Instead, leave some space on the serving vessel to help your audience to appreciate the food without the image becoming too dense or busy.


25. Serve the food
We’ve already mentioned that taking photographs of food while cooking is a great way of capturing energy and freshness and can easily beat a photo of the completed dish.
The same holds true for showing food ready for serving.
Food benefits from being presented so that it looks like something you wouldn’t be able to resist popping into your mouth.
Compare an image of a fresh-baked loaf of bread resting on a wooden cutting board to one that has been sliced, revealing the grain and soft interior texture of the loaf.
It can also be very effective to capture action shots of food being served or plated, such as gravy being poured onto a cooked roast, or olive oil drizzled over a salad.
26. Make use of contrasts
Don’t get stuck trying to create contrast during image processing, instead think ahead so that you have natural contrasts to work with during editing.
So, if you are shooting light-colored food, use a dark-colored plate. If you’re shooting dark-colored food, use a white or colorful plate.
The same thing goes for texture. A porcelain plate on a marble kitchen counter won’t be as eye-catching as the same plate photographed against a wooden surface with a rich grain.
27. Try tethering
When it comes to food photography you want to avoid having to deal with the time and effort required to redo your whole shoot at any cost.
This means doing whatever you can to ensure that the photographs you are taking are going to provide you with the raw material you need to produce a satisfactory final product.
Tethering is an important tool for ensuring that you are capturing the images that you want.
By connecting your camera to image editing software on your desktop or laptop you can check on your shots as you work, giving yourself a clear idea of what the final product will look like.
28. Give yourself options
A rule that applies to most professional photography applies in equal measure to food photography.
When you’re shooting create a high volume of shots to choose from. Mix up your angles and lighting and ensure you get multiple images from each new perspective.
Every extra image you take boosts your options when it comes to the image editing stage of your food photography project.
29. Avoid over-manipulating your image
It can be tempting to go wild with image editing software and filters once you have completed your shoot and want to bring out the best in your images.
While this approach works well for photography subjects like landscape and architecture, it is not well suited to food photography.
That is because colors and saturation need to be true to the dish or food product you are photographing.
Get this wrong with food product photography and you could easily end up disappointing your customers when they order or prepare the final product.
Distorting colors and exposure can also make your food look fake, unnatural, and unpalatable.
30. Beware of image compression
You’ve completed your food photography shoot and captured hundreds of RAW format images. You’ve then edited them to bring out colors, textures, and contrast.
However, when you upload them to your website or social media account, the result looks blurry and unappetizing.
That’s not because there is anything wrong with your images, but because many digital platforms will compress your images once they have been uploaded to the Internet.
To avoid automated image compression, find out what the ideal image specifications are for the platform you are using, and edit your images to meet these before uploading your images.
31. Hire an expert
If you’re a food blogger or restauranteur, there’s no need to take the DIY approach to food photography.
Professional food photographers have the experience and expertise required to generate high-quality images that will make your food look as great as it tastes.
Cherrydeck is an online platform designed to connect individuals looking for professional photography services with our vibrant community of experienced photographers.
You can easily filter photographers by niche, check out their portfolios, and get in touch if you want to know more about their work.
You can even create photography briefs and have members of our community pitch to work on your food photography project.
And if you need photography for packaged food products for an e-commerce website, Cherrydeck Branded StockTM is the perfect solution for your requirements.
See how the coffee and tea brand J. Hornig created custom on-brand photography with Cherrydeck

Simply send us your product samples and a professional food photographer will capture your product range and submit a library of images for review within 3 weeks. You’ll only be charged for the food product images you choose to use on your website
Visit Cherrydeck now to find out more.